 04.Servlet入门
# 01.创建Servlet
APITest1
├── pom.xml
├── src        // 源代码和配置文件的根目录
│   ├── main   // 主要的源代码和配置文件目录,用于生成项目的可执行文件或库
│   │   ├── java      // Java源代码目录
│   │   │   └── org
│   │   │       └── example
│   │   │           ├── HelloServlet.java  // 一个Servlet示例类,用于处理HTTP请求和响应

│   │   ├── resources  // 资源文件目录,如配置文件、XML文件等
│   │   └── webapp     // Web应用目录
│   │       └── WEB-INF      // Web应用程序的配置目录
│   │           └── web.xml  // Web应用程序的配置文件,定义了Servlet、过滤器和监听器等
│   └── test  // 测试代码目录,包含单元测试和集成测试的代码
│       └── java

└── target  // Maven构建生成的目录,包含了项目的可执行文件或库
    ├── apitest.war
1
2
3
4
5
6
7
8
9
10
11
12
13
14
15
16
17
18
2
3
4
5
6
7
8
9
10
11
12
13
14
15
16
17
18
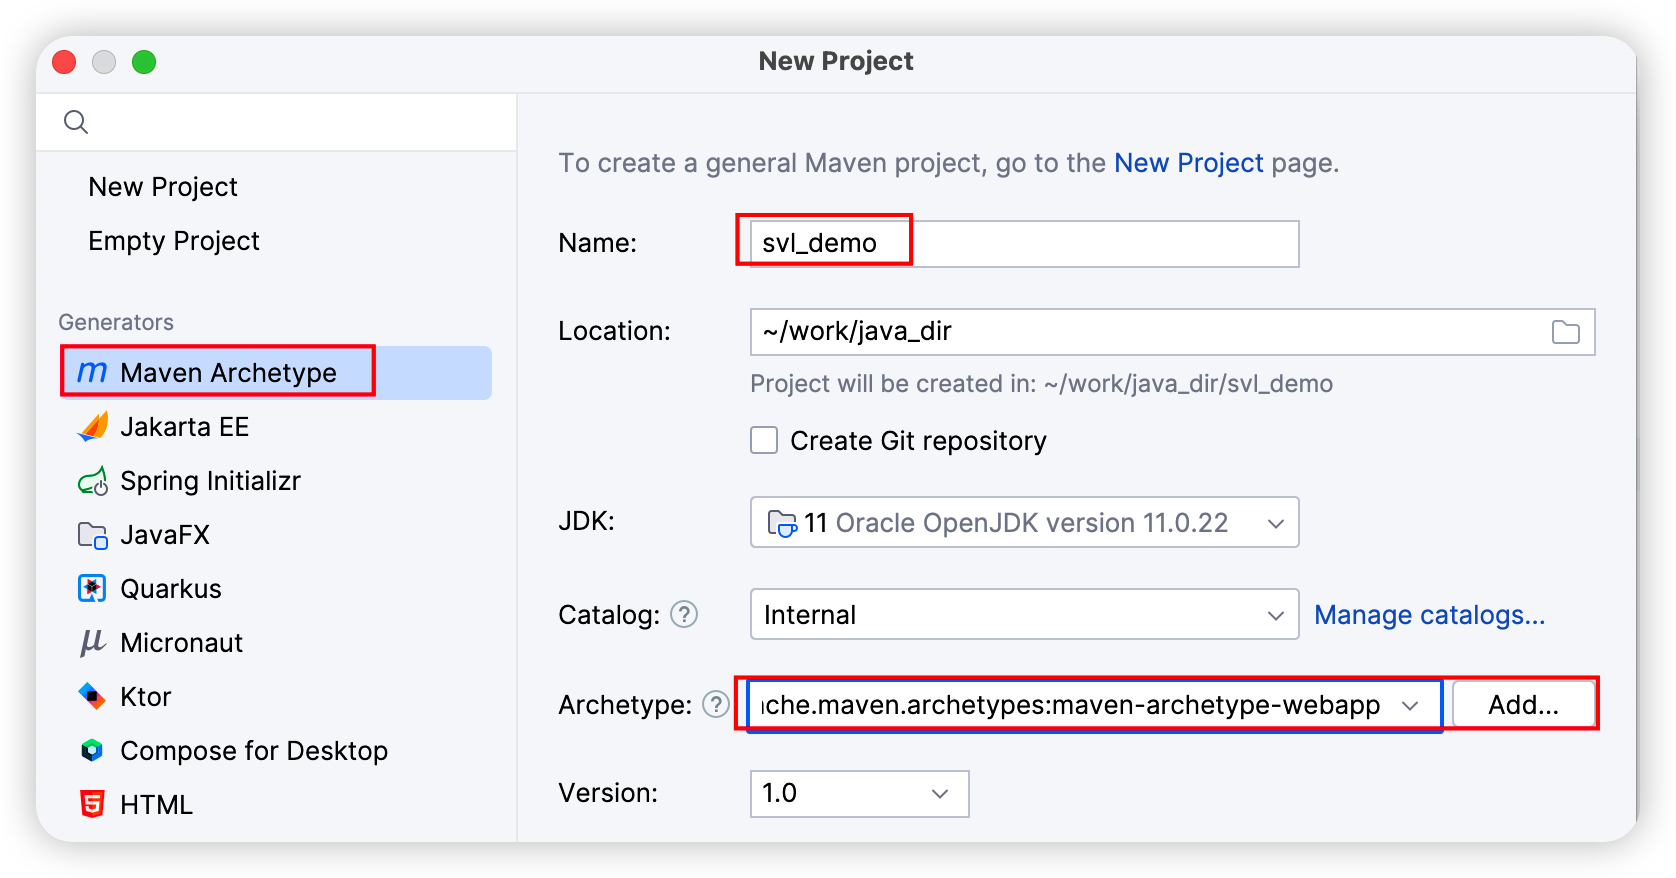
# 1、创建项目

# 2、引入依赖
- 在maven的配置项文件pom.xml中,粘贴刚才的内容(需要先创建一个标签)
    <dependencies>
        <dependency>
            <groupId>javax.servlet</groupId>
            <artifactId>javax.servlet-api</artifactId>
            <version>4.0.1</version>
            <scope>provided</scope>
        </dependency>
    </dependencies>
1
2
3
4
5
6
7
8
2
3
4
5
6
7
8

注意:第一次引入依赖的时候可能需要等待一些时间(maven需要进行下载)
mvn clean install1
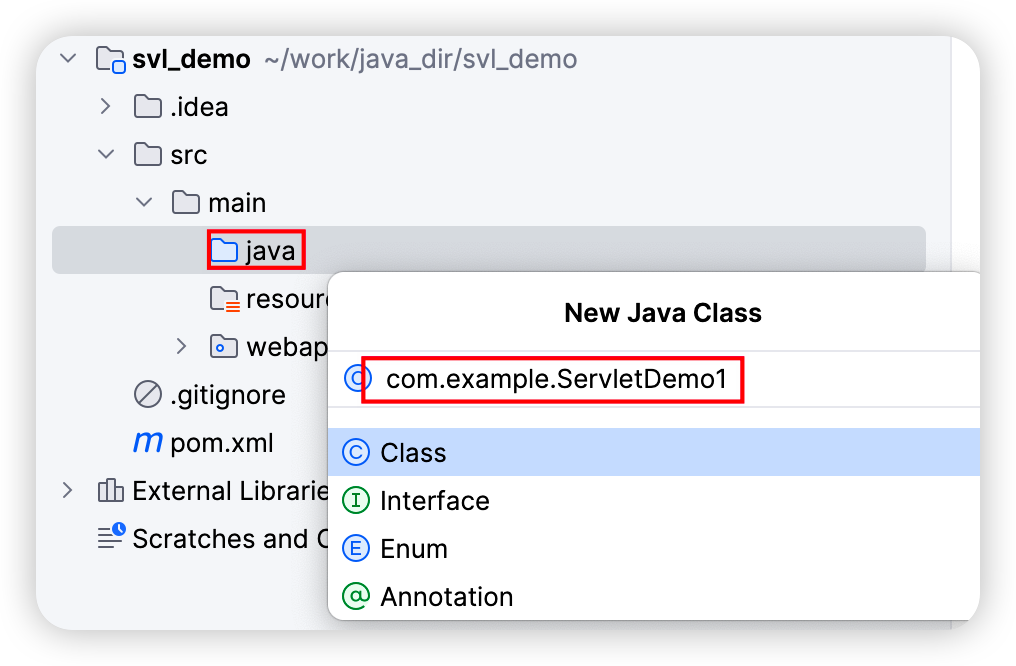
# 3、编写代码

import javax.servlet.annotation.WebServlet;
import javax.servlet.http.HttpServlet;
import javax.servlet.http.HttpServletRequest;
import javax.servlet.http.HttpServletResponse;
import java.io.IOException;

@WebServlet("/hello")     // 这个注解的作用是进行路由匹配
public class HelloServlet extends HttpServlet {
    @Override
    protected void doGet(HttpServletRequest req, HttpServletResponse resp) throws IOException {
        System.out.println("hello world");          // 这是在tomcat的控制台中打印
        resp.getWriter().write("hello world");   // 在对应的服务器上进行打印
    }
}
1
2
3
4
5
6
7
8
9
10
11
12
13
14
2
3
4
5
6
7
8
9
10
11
12
13
14
# 4、Tomcat插件运行
- pom.xml添加Tomcat插件
<build>

    <plugins>
    	<!--Tomcat插件 -->
        <plugin>
            <groupId>org.apache.tomcat.maven</groupId>
            <artifactId>tomcat7-maven-plugin</artifactId>
            <version>2.2</version>
            <configuration>
            	<port>80</port>
                <path>/</path>
            </configuration>
        </plugin>
    </plugins>

</build>
1
2
3
4
5
6
7
8
9
10
11
12
13
14
15
16
2
3
4
5
6
7
8
9
10
11
12
13
14
15
16

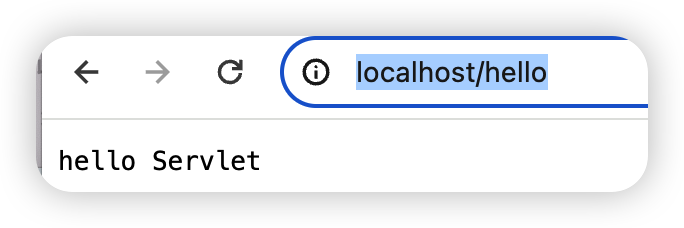
- http://localhost/hello

上次更新: 2025/2/19 16:42:39
